
How to Apply Eyeshadow Like a Pro
Eyeshadow can transform your look, adding depth, colour, and personality to your eyes with just a few swipes. Applying it like a pro takes more than just a palette and a brush—it’s about technique, prep, and a little practice. Whether you’re new to makeup or looking to level up, this step-by-step guide breaks down the process, from priming your lids to blending like an expert. If you’re searching for quality products, exploring the best eyeshadow palette price in Pakistan can help you find the perfect match for your budget and style. Let’s dive into the essentials and turn your eyes into a masterpiece!
Why Technique Matters
The Difference Between Good and Great
Applying eyeshadow isn’t just about slapping colour on your lids; it’s about creating a polished effect that enhances your features. Good technique means smooth transitions, balanced shades, and lasting looks. Without it, you might have patchy spots or colours that don’t pop. A pro-level application starts with understanding your tools and steps, and even beginners can nail it with the right approach. Not sure where to start? Choosing from the Best Eyeshadow Palettes for Beginners can simplify the process with curated, easy-to-use shades that make application effortless.
Confidence Through Skill
Mastering eyeshadow boosts your makeup confidence. When you know how to blend a crease or highlight your brow bone, you feel in control, ready to tackle any style. It’s less about perfection and more about knowing what works for you, whether a soft wash or a bold cut-crease. A solid technique saves time, turning a rushed morning into a quick, stunning result.
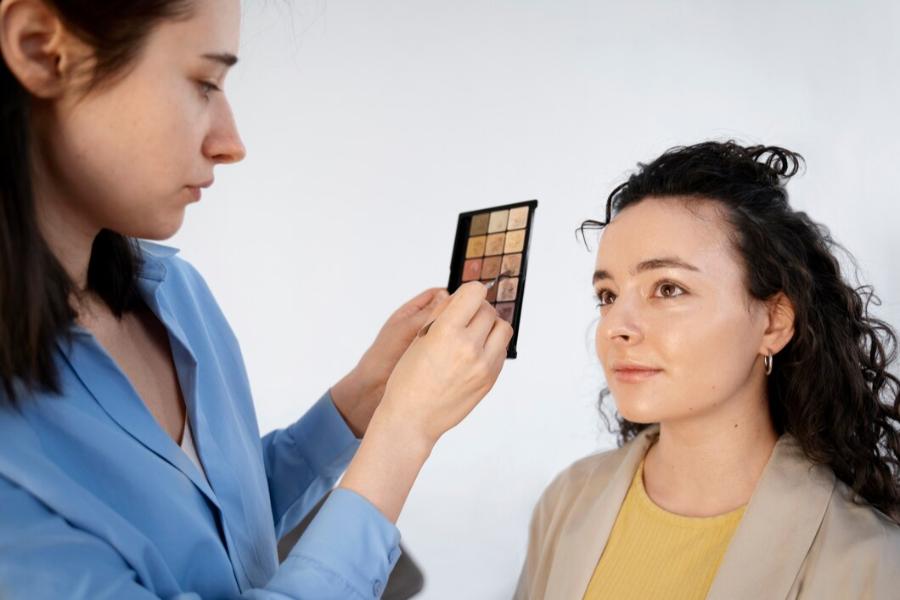
Tools of the Trade
You don’t need a million brushes, but the right ones help. A fluffy blending brush, a flat shader, and a small detail brush cover most needs. Add a good palette and primer, and you’re set. Want your look to stay put all day? Long-lasting Eyeshadow tips can ensure your effort doesn’t fade by lunch. With these basics, you can prep and apply like a pro. Trending Eyeshadow Looks can elevate your makeup game, helping you stay stylish and on point.
Prepping Your Eyes
Clean and Moisturize
Start with a clean slate. Wash your face to remove oil or old makeup, then dab on a light eye cream. This hydrates your lids, smoothing out fine lines so your eyeshadow glides on evenly. Let it sink in for a minute before moving forward.
Prime for Success
Primer is your secret weapon. A thin layer locks eyeshadow in place boosts color payoff, and prevents creasing. Use your fingertip or a small brush to apply it from the lash line to the brow bone, blending it for a seamless base. This step turns a good look into a great one, especially for all-day wear.
Step-by-Step Application Guide
Step 1: Base Shade
Grab a light, neutral shade, something close to your skin tone or a soft beige. Using a flat brush, sweep it across your entire lid, from lashes to brow bone. This evens out your lid colour and sets the stage for layering, making every shade pop against a clean backdrop.
Step 2: Crease Color
Pick a medium shade, like taupe or soft brown, for depth. Apply a fluffy blending brush to your crease, the dip above your lid where your eye naturally folds. Use windshield-wiper motions to blend it back and forth, softening edges to look natural. Keep it slightly above the crease for a lifted effect.
Step 3: Lid Shade
Now, for the fun part: your main lid colour. Choose a shade that stands out, maybe a shimmer or bold matte. Use a flat brush to pack it onto your lid, staying below the crease. Press, don’t swipe, to maximize pigment, then blend the top edge into the crease shade for a smooth transition.
Step 4: Outer Corner Depth
Add drama with a darker shade; think deep brown or charcoal. Apply a small, tapered brush to the outer third of your lid, forming a subtle “V” where it meets the crease. Blend inward and upward, softening harsh lines. This defines your eye shape and adds intensity.
Step 5: Highlight
Finish with a light, shimmery shade, like champagne or ivory. Dab it on your brow bone and inner corner with a small brush or fingertip. This brightens your eyes, making them look bigger and more awake. Go light; a little shimmer goes a long way.
Blending Like a Pro
The Key to Seamless Looks
Blending is where the magic happens. Use a clean, fluffy brush to soften edges between shades, circling gently where colours meet. Don’t overdo it; too much blending muddies the look. Aim for a gradient that flows without losing definition.
Fixing Mistakes
Patchy spot? Add a bit more of the shade and blend again. Harsh line? Sweep a clean brush over it to diffuse. Blending fixes most hiccups, so keep that brush handy and take your time; it’s worth the effort.
Adding Extra Flair
Lower Lash Line
Run a bit of your crease or outer corner shade along your lower lash line with a small brush for a cohesive look. Blend it softly for a smoky effect, tying the top and bottom together without overpowering your eyes.
Shimmer Accents
Love sparkle? After blending, add a shimmery shade to the centre of your lid or inner corner. Press it on with a finger for maximum glow, giving your look a pro-level pop that catches the light just right.
Tools You’ll Need
Brushes for Every Step
- Fluffy Blending Brush: Softens edges and blends crease shades.
- Flat Shader Brush: Packs colour onto the lid with precision.
- Small Detail Brush: Perfect for outer corners and lower lash lines.
Beyond Brushes
A primer, a palette with versatile shades, and a makeup remover for cleanup round out your kit. Fingertips work, too, especially for shimmer, so don’t stress if you’re low on tools.
Common Mistakes to Avoid
Too Much Product
Loading your brush with too much shadow leads to fallout and uneven colour. Tap off excess before applying, building up gradually for control and a cleaner finish.
Skipping Primer
No primer means creasing and fading. Even a cheap one makes a difference, so don’t skip this step if you want your look to last.
Harsh Lines
Unblended edges look amateur. Always blend where shades meet, using a light hand to keep it polished and professional.
Practice Makes Perfect
Start Simple
Begin with two shades, a base and a crease colour, to get the hang of blending. As you gain confidence, add more layers and experiment with placement, like a pop of colour or a smoky outer corner.
Build Your Skills
Try a new technique weekly, maybe a halo eye or winged shadow. Practice on low-stakes days; soon, these steps will feel second nature, turning you into your pro.
Conclusion
Applying eyeshadow like a pro is about blending prep, technique, and creativity into one seamless process. From priming your lids to adding that final shimmer, each step builds a look that’s uniquely yours. Whether you’re keeping it simple or going bold, these skills elevate your makeup game. It’s not just about following steps; it’s about understanding how each layer enhances your eyes, from the subtle depth of a crease shade to the vibrant pop of a lid colour. With practice, you’ll develop an instinct for what flatters your features, turning a basic routine into an art form. This mastery opens doors to endless possibilities, letting you adapt your look to any mood, occasion, or trend, all while feeling confident in your craft.
FAQS
How to put eyeshadow on like a professional?
To apply eyeshadow like a pro, follow these steps:
Prime Your Lids: Start with an eyeshadow primer to ensure the makeup lasts longer and prevents creasing.
Apply a Base Color: Use a neutral shade all over the lid to create a smooth base.
Build the Crease: Apply a slightly darker shade in the crease to add depth. Blend well to avoid harsh lines.
Define the Outer V: Apply a darker shade in the outer corner of your eye to create a “V” shape for more dimension.
Highlight the Inner Corner and Brow Bone: Use a light, shimmery shade in the inner corner and under the brow to brighten your eyes.
Apply Lid Color: Choose a medium or light shade for your eyelid, using a flat brush to apply it for intensity.
Blend: Blend all the colors together for a seamless finish.
Line Your Eyes: Define your eyes with eyeliner along the upper lash line, adding a slight wing for drama.
Finish with Mascara: Apply mascara to your lashes to open up your eyes. You can add false lashes for extra volume.
Clean Up: Remove any excess eyeshadow under your eyes with a cotton swab and set your makeup with a setting spray.
Following these steps will help you create a professional-looking eyeshadow look!
How do you apply eyeshadow effectively?
Always start with a primer or concealer to help the color last. Use a fluffy brush for blending and a flat brush for packing color. Apply light shades on the lid, medium shades in the crease, and dark shades on the outer corner for depth. Blend in circular motions for a seamless finish. Avoid using too much product at once.
What are the don'ts of eyeshadow?
Don’t apply too much product at once—build color gradually. Avoid harsh lines by blending properly. Don’t use shimmery shades in the crease, as they don’t define the eyes well. Never skip primer if you want long-lasting eyeshadow. Avoid using dirty brushes, as they can cause patchy application.
How can I make my eye makeup attractive?
Use shades that complement your eye color and skin tone. Highlight the inner corners and brow bone for a brightening effect. Blend shadows seamlessly to create a smooth transition between colors. Add eyeliner and mascara to define your eyes further. Consider false lashes or a touch of shimmer for extra glam.
How to apply 3 shades of eyeshadow?
Start with a light shade as the base all over the lid. Apply a medium shade in the crease and blend well. Use the darkest shade on the outer corner for depth and definition. Blend the colors together for a seamless transition. Add shimmer or highlighter to the inner corner for extra brightness.