
How to Apply Liquid Lipstick Like a Pro
Liquid lipstick is a must-have in the beauty world, loved for its rich pigments, long-lasting wear, and ability to enhance any look instantly. Whether you’re new to makeup or a pro, applying liquid lipstick the right way can make all the difference. It’s not just about adding color—it’s about prepping your lips, ensuring smooth application, and choosing the perfect formula for all-day comfort. If you’re searching for quality options at great prices, exploring the best liquid lipstick price in Pakistan can help you find a formula that offers both durability and a flawless finish.
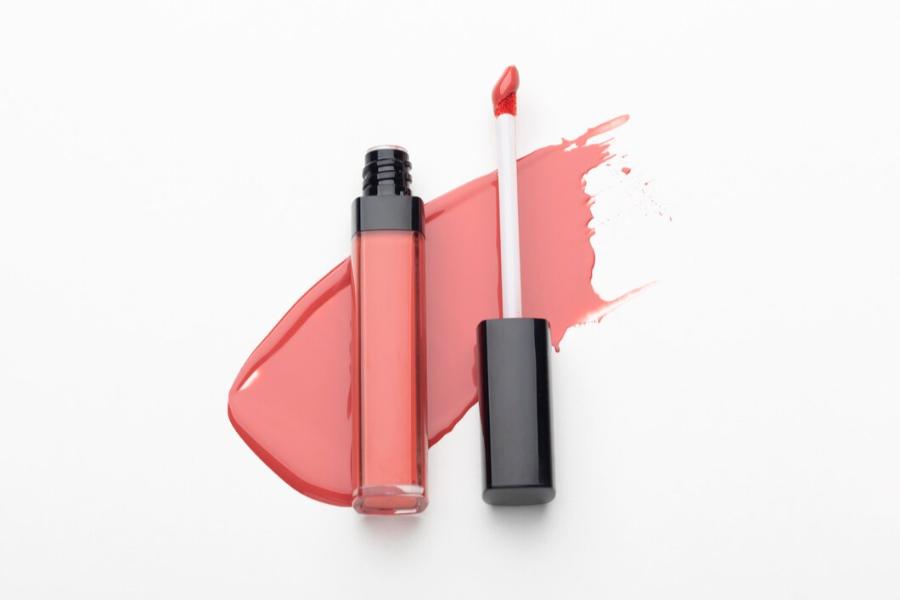
Why Choose Liquid Lipstick?
Before diving into the how-to, let’s discuss why long-lasting liquid lipsticks deserve a spot in your makeup bag. Unlike traditional bullet lipsticks, liquid formulas offer intense pigmentation, quick-drying properties, and a range of finishes, from velvety matte to high-shine glossy. They’re perfect for long days, special occasions, or whenever you want a lip look that doesn’t budge. But here’s the catch: without the right application method, you might end up with cracked, uneven, or feathered lips. That’s where this step-by-step guide comes in to help you apply liquid lipstick like a pro and avoid the pitfalls
Step 1: Prepare Your Lips for Perfection
Smooth, well-prepped lips are the foundation of a stunning liquid lipstick application. If your lips are dry or flaky, the formula will cling to imperfections, ruining the finish. Start by exfoliating your lips to slough off dead skin. You can use a store-bought lip scrub, a DIY sugar and honey mix, or even a soft, damp washcloth rubbed in circular motions. This step ensures a clean canvas for the colour to glide on evenly.
Next, apply a lightweight lip balm to hydrate your lips. Let it sit for 2-3 minutes to soak in; this keeps your lips soft without leaving them too slick. Before moving on, gently wipe off any excess balm with a tissue. Why? Too much moisture can interfere with the liquid lipstick’s ability to adhere and dry properly, leading to smudging or a shorter wear time. Prepping right sets you up for success.
Pro Tip: Timing Is Everything
Don’t rush into applying your lipstick right after balm. Give your lips a moment to settle, hydrated but not greasy, so the formula grips perfectly.
Step 2: Outline Your Lips with Precision
Most liquid lipsticks come with a doe-foot applicator, a handy tool for creating crisp edges. Dip the pointed tip into the product, wiping off any excess to avoid overloading, and start at your cupid’s bow. Carefully trace the natural shape of your upper lip, moving outward to the corners. Then, outline your lower lip, following its curve. This step defines your lip shape and prevents the colour from bleeding beyond your lip line, a common issue with bold shades.
Consider using a lip liner in a shade that matches or complements your liquid lipstick for extra control. Draw your outline with the liner first, then layer the liquid formula. This sharpens the edges and adds a barrier to keeping the colour in place all day. Precision is key to that pro-level look whether you’re going for a subtle nude or a dramatic red.
Troubleshooting: Fixing Uneven Lines
If your hand slips, don’t panic. Keep a cotton swab and micellar water nearby to clean up mistakes before the lipstick sets. A steady hand comes with practice, so don’t be discouraged if it takes a few tries to perfect. If needed, use micellar water to remove liquid lipstick quickly and start fresh.
Step 3: Fill in the Color Like an Expert
With your outline complete, it’s time to fill in the rest of your lips. Using the flat side of the applicator, apply the liquid lipstick in thin, even layers. Start from the centre and work out, ensuring every area is covered. Here’s the golden rule: less is more. Piling on too much product can lead to clumping, cracking, or an uneven texture once it dries. Liquid lipstick sets fast, so move with purpose, but don’t rush.
If you’re torn between finishes, matte and glossy liquid lipsticks each have their charm. Matte offers a sophisticated, velvety look that’s great for all-day wear, while glossy adds a touch of glamour with its reflective shine. Your application technique stays the same either way; just choose a formula that matches your vibe.
Application Tips in Bullet Points
Here are some expert pointers to nail this step:
- Start with a small amount of product to avoid overloading the applicator.
- Work in sections (centre, then sides) for even coverage.
- Use a mirror to check for gaps, especially in natural light.
- Avoid pressing your lips together mid-application; it can smear the wet formula.
- For bolder colour, wait for the first layer to dry, then add a second thin coat.
Step 4: Clean Up for a Polished Finish
Pros make mistakes, especially with tricky shades like deep berries or bright corals. Grab a small concealer brush or cotton swab dipped in micellar water if you go outside the lines. Gently wipe away smudges to sharpen your lip line. For an ultra-defined look, trace around your lips with a bit of concealer using a flat brush. This creates a crisp contrast that screams “professional.”
This step is especially crucial if you’re using one of those best long-lasting liquid lipsticks set like cement. Once they dry, corrections get tougher, so act fast.
Step 5: Let It Dry and Lock in the Look
Patience is your friend here. After applying, avoid pressing your lips together or eating/drinking for at least 60 seconds; let the formula dry completely. Depending on the brand, most liquid lipsticks are set within 30-90 seconds. To test, lightly touch your lip with a clean finger; you’re good to go if no colour transfers.
For maximum staying power, especially with long-lasting formulas, resist the urge to reapply throughout the day unless it’s truly fading. A well-applied layer should carry you through hours of wear, perfect for busy schedules or nights out.
Extra Staying Power Trick
If you’re rocking a matte liquid lipstick, lightly dust translucent powder over your lips with a fluffy brush. This further sets the colour, making it budge-proof through meals and conversations.
Troubleshooting Common Liquid Lipstick Problems
Even with the best technique, hiccups happen. Here’s how to fix the most-searched-for liquid lipstick issues with bullet-point solutions:
- Cracking or Flaking: This occurs when you skip exfoliation or apply a too thick layer.
- Solution: Exfoliate weekly and use thin layers only.
- Feathering or Bleeding: Bold colours can creep into fine lines around your mouth.
- Solution: Apply a lip primer or liner as a barrier.
- Dryness After Wear: Matte formulas can leave lips parched.
- Solution: Hydrate with a rich balm after removal.
- Uneven Application: Streaks happen if lips are too oily.
- Solution: Wipe off excess balm before starting.
Insider Tips to Elevate Your Liquid Lipstick Game
Ready to take it up a notch? These pro-level hacks will make your application stand out in bullet-point form:
- Mix two liquid lipsticks (like a nude and a pink) on your lips for a custom shade and blend before they dry.
- Use a hydrating lip mask to plump and smooth your lips the night before big events.
- Slightly overline your lips for a fuller look, but keep it subtle to stay natural.
- Swatch your liquid lipstick on your hand first to check the true colour and texture.
- Store your liquid lipsticks upright in a cool, dry place to maintain their consistency.
Why Mastering This Matters
Applying liquid lipstick like a pro isn’t just about aesthetics; it’s about confidence. A perfectly painted pout can tie your look together, whether you’re heading to the office or a party. Plus, with so many shades and finishes, from muted mauves to fiery reds, there’s a liquid lipstick for every mood and skin tone. The effort pays off when your colour stays vibrant and intact for hours.
Conclusion
Applying liquid lipstick like a pro takes practice, but it’s a game-changer once you nail the process. Start with smooth lips, outline with care, fill with precision, and finish confidently. Whether you love the staying power of long-lasting formulas or the versatility of matte and glossy finishes, this guide covers you. Experiment with shades, play with techniques and make it your own because great lips are worth the effort.
FaqS
How to apply liquid lipstick perfectly?
Start by exfoliating and moisturizing your lips to create a smooth base. Outline your lips with a matching lip liner for precision. Apply the liquid lipstick in thin layers, starting from the center and blending outward. Let it dry completely before pressing your lips together. Clean up the edges with concealer for a sharp finish.
What are the 3 steps to applying lipstick like a pro?
First, prep your lips by exfoliating and applying a hydrating balm. Second, define your lip shape with a lip liner that matches your lipstick. Third, apply the lipstick evenly, starting from the center and working outward for a smooth and flawless finish.
How to get liquid lipstick to stay on?
Ensure your lips are dry and free of oils before application. Apply a lip primer or use a thin layer of foundation to create a base. Apply the liquid lipstick in thin, even layers and allow it to dry fully. Blot gently with a tissue and apply a second coat if needed. Avoid oily foods, as they can break down the formula.
How do you make lipstick look flawless?
Exfoliate your lips to remove dry skin and apply a hydrating balm. Use a lip liner to define your shape and prevent feathering. Apply the lipstick with a steady hand, starting in the middle and moving outward. Blot with a tissue and reapply a second thin layer for longevity. Finish by cleaning up edges with a small brush and concealer.
Is liquid lipstick easier to apply?
Liquid lipstick can be tricky at first but provides precision and long wear. It requires careful application as it dries quickly and can be unforgiving. Using a lip liner helps with control and shaping. Unlike traditional lipstick, it doesn’t smudge easily once set. With practice, it can be just as easy to apply as regular lipstick.